
Quick Navigation
We are going to discuss here how you can easily install WordPress with an SSL certificate with the help of a local By flywheel.
So have you ever wanted to set up your computer to be able to work with WordPress without the need for a hosting company?
There are many web server for WordPress, that is offering WordPress hosting but for a beginner it is best idea to learn WordPress on your computer server.
You can also get rid of high paying web server for WordPress by install WordPress locally with local by flywheel.
Well in this article I’m going to show you just how easy that is with local by flywheel software and install WordPress locally.
The Best thing is that, it is completely available for free, so you can easily host WordPress on Local host.
WordPress on Localhost With the help of Local by flywheel:
WordPress is actually a PHP LMS, So it works same as it works on online hosting.
So, When we host it on our PC, it would definitely work faster than any online hosting.
let’s have a look and now we are going to use local by flywheel and install WordPress locally.
Learn get going with WordPress on our local computer or localhost, so the software we are going to use is “local by flywheel”.
Local by flywheel allows us to install WordPress locally and we can able to install WordPress Manually.
Not only it takes to WordPress setup locally, But allows us to do things like duplicate sites set up templates and so much more.
This is completely free and a great environment to test your WordPress skills.
And try or install WordPress Theme and plugin and to develop websites without the need for a hosting company.
You can as much as you want on your WordPress localhost and experience the WordPress Windows server version also.
So, lets get to your computers and take a look at how we can set up our software, and how we can start working with “local by flywheel”.
How To Download and Install Local by Flywheel Software:
This software provides one of the best WordPress setup on their dashboard and you could be able to install WordPress locally with the help of local by flywheel.
To Download the Local Flywheel Software, You can goto local.getflywheel.com or you can Click Here.
So to grab yourself a copy of “local flywheel” all you need to do is visit “local.getflywheel.com”.
And you’re gonna come to this website.
Where you can see exactly what it’s about or you can just simply download it and start installing it.
So if you’ve got the free download option you can see we’ve got the choice.
For both Windows and Mac we’re gonna stick to Windows in this instance Windows 10.

But the whole process is pretty much the same once you’ve installed it so you can put your relevant details.
Installing Process and Requirements:
If you want to get it now and make sure you’ve got at least 500 megabytes of space on hard drive.
Where you’re going to install flywheel.
So once you’ve done that we’re now ready to start flywheel up for the first time.
Now when you go to the install process you’re gonna have a couple of prompts.
That are gonna ask you to allow certain access to your computer.
You’re gonna need to make sure that you say “yes” to all that before you can actually go in and start using flywheel.
It depends on what you like by these different changes.
It’s gonna make to your computer you should then have flywheel set up and ready to start.
We are going to be starting the flight now.
We’re gonna take a look at the options inside there to get started with creating our local versions of our websites.
Getting Started With the Software:
So start the flywheel software and this is the plain and simple interface you’re gonna get when you start over the first time.

So if you want to you can come into the settings and come into preferences and you can go through there.
You can set up all the various different things that you want to make sure that everything is configured the way you’d like it to.

So if you work on a specific version of PHP on the server that you’re working with or you’re going to be using a MySQL on MySQL version or a particular web server.
You can set all those things that at this point to ensure that your environment you’re working with offline is as close as possible to what you’re gonna work with online that should minimize any potential problems.
Features:
In Preferences You can see these options, You can see this if I do site defaults so we can set those up in there we’ve got options for
- Exporting: The different file exclusion filters.
- Advanced: which you can go in and you can see this is an experimental option which you can enable or disable depend upon what you’d like to test out, for the most part, most of these things are not that important.
- Blueprints: pretty useful because this allows you to save a particular setup as a blueprint a sort of preset should we say and then you can just load it in with all those different things.
If you use the theme for the basis for everything or Elementor Pro, for example, those plugins you can just save that as a blueprint then.
When you create a new site that blueprint can be applied to it and all those different plugins and settings can be applied just to speed up the development process.
- Add-Ons: You also think that add-ons which are add-ons for the actual “local by flywheel” itself so you know these are kind of things we’re going to leave as they are for now.
Steps to Install WordPress locally by using local by flywheel:
So we’re gonna come back at this with the closeout of this and we’re now ready to go and create our first site.
Now we use in the free version of flywheel you can if you’ve got a flywheel account link the two together and you get some expanded functionality.
But we’re not gonna worry too much with that we’re just looking at how we can use our local computer to create and set up our own WordPress based websites.
Step 1:
So we need to do is click on create a new site.
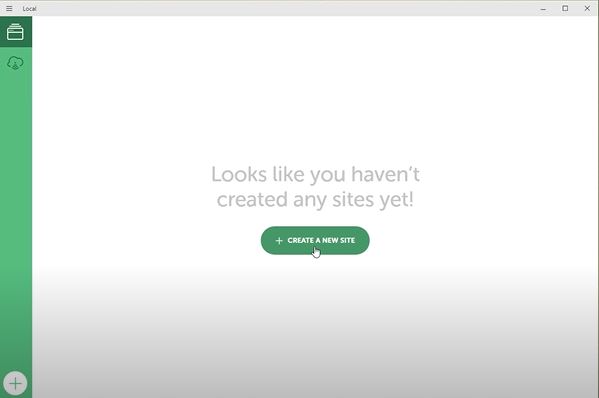
That allow us to go in and name it so we’re gonna call this for example “Ocean WPS” let’s just say I’m testing that out we open expand the Advanced Options.

You can see we’ve got the domain we want to use this local site path and do we want to use a blueprint at this point.
We haven’t actually set up a blueprint so we don’t have anything we can use in this so you can see we don’t really have much of an option we’ll click on “CONTINUE”.
Step 2:
We’ve then got preferred or custom so you can see this is using the set up that we could have configured in the Preferred.

I’ll leave that as is we’ve also connected our flywheel account if we have a flywheel account if we want to say something I’ve Custom.
You can see we can click on there and we can now change the PHP version the server and MySQL versions it also tells you to need to download some different dependencies.
if you enable this option so we’re gonna worry wouldn’t leave it as preferred and we’ll click on “CONTINUE”.
Step 3:
We can now go through and give it the username the password and the email address that we want to use for this particular copy of WordPress on our local machine.
We’ve got Advanced Options to say is this a multi-site well no we’re not gonna worry about that so we can just close that down.

So I’ll leave those as they are and we’ll click on “Add Site”.
Tip: “You can see that and I’ll go through ask us are we sure we want to do this particular change we’ll say yes.
We do that will now go through and start downloading all of the files that are needed to install a fresh clean and most up-to-date copy of WordPress on our server.”
Admin Features:
Once you let that run through you can see there are all the different things that have been set before us.

As you can see in the picture above, We could log in to our Admin at this point overview the site by clicking Visit Site.
We can easily switch it on and off from the development mode and we can also stop the site.
If we don’t want us to be running in the background or we can come down and say we stopped all of the sites by clicking Stop All.
So you can see this now goes to and tells us what’s been set up we can then go through and see the database.
And if we want to jump into the admin side of things we can come into that if we want to set up a fake SSL, with you can install SSL certificate WordPress, we can do that and we’ve also got utilities.
Where we can open up and start-up mail hog so we can test any kind of mail setup.
You can see we’ve got the option to Connect to Flywheel and we can live link enable there’s no live link is effectively a way that other people external to the website can actually access this.
So if you’ve got a client and you’re setting up flywheel to create the site for them and you want to give them access to it you can make a live link on here and then you can share that link with them.
They’ll be able to log in and take a look at that on your local windows server.
Done You Have now hosted WordPress Website on your local machine server or on your localhost.
Configure your WordPress Website on Localhost:
Now if we can click on Admin,
That will then take us through to our development locations you can see ocean WP local.

We’ve then got digitally put in our login details and once we’ve done that we can simply log in to our dashboard for our test site if I bring my password that is once you’ve logged in,

You can see, now we’ve got our dashboard we can start working and doing whatever we want in it just close that down a second.
If you want to view the site we can simply jump into the “Local flywheel” software dashboard and click on View site.
And that’ll take us through and you can see again oceanwp.local or whatever you name the site.
When you set that up at the beginning so it’s incredibly easy to just come in and start working on your site exactly as you expect.
So we can go into the dashboard or we can with the front end of the site and start working so you’ve seen how easy it is to start working with those things.
Configure Database:
We can easily jump over and take a look at our database should we want to make any changes directly in there so we can jump into the database.


You can see that’ll open up something that’s very similar to PHP myAdmin.
It allows you to go through all the tables we do some basic things in here we can open up and take a look at any of the information in any of the different settings of our database.
So that’s quite useful should you need to go in to make some changes or edit any of your database itself directly.
How to Change Site Name or Domain Name in local host WordPress?

Site setup you can see we’ve got all this information if we want to change the domain at any point so we might want to change this to the ocean to “db2” for example.
We can click on change update those details on there change the domain and that’s all done for us.
You have now WordPress local server on your machine.
So that’s “local by flywheel” a great free piece of software that allows us to set up our computer as a development environment for working with WordPress hopefully what you’ve seen is very easy and very versatile to work with.
Have question?
If You have any queries about anything regarding this website or about this article, Contact US.
Share With Care!