Quick Navigation
Are you wandering around on your PC to find out How to fix a USB flash drive not showing up in Windows 10 or Windows 8, or even Windows 7?
Then you are at the most suitable place, and I will tell you briefly and to the point ways to fix “Hard Drive Not Showing up in Windows 10” issue.
People has been facing “Hard Drive Not Showing up in Windows 10” issue more often than usual and sometimes, it’s easy to fix, and sometimes, you can have multiple issues.
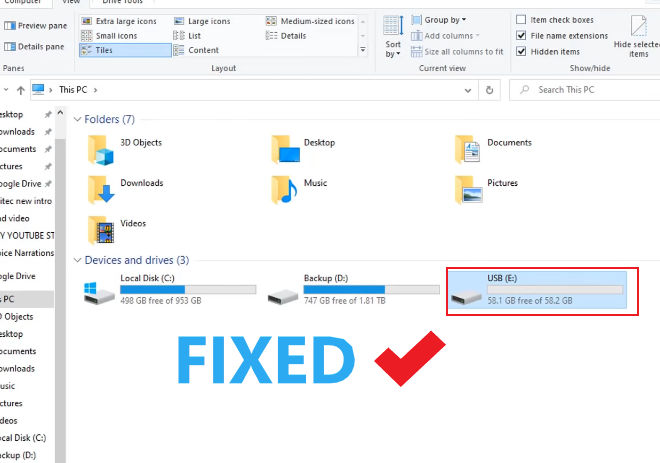
As you can see here I’ve got my USB flash drive plugged in, and it’s not displaying on my computer like in the picture below.

Now sometimes it’s just a case of having no drive letter, and it won’t show up, and sometimes there’s a another problem which needs to be done to fix “Hard Drive Not Showing up in Windows 10”.
Quick Checkup:
I am going to tell you my experience when I faced this issue and fixed it with the help of the following solutions..
- We’ll take a look in Disk Management.
- To open Disk Management, Right-click on ThisPC and click on Manage.

- Now Select Disk Manager from the left sidebar.


We’re inside the disk management. I’ve got “disk 2,” which is my removable USB flash drive.

You would see there’s a couple of partitions here when I right-click on it.
So, I am going to explain some solutions which can solve the issue.
Solution 1: Change Drive Letter
When you change the drive letter or give it a drive letter, it will then become visible.
- Right-click on the drive.
- Select “Change drive letter and Paths“
- Now change into any letter.

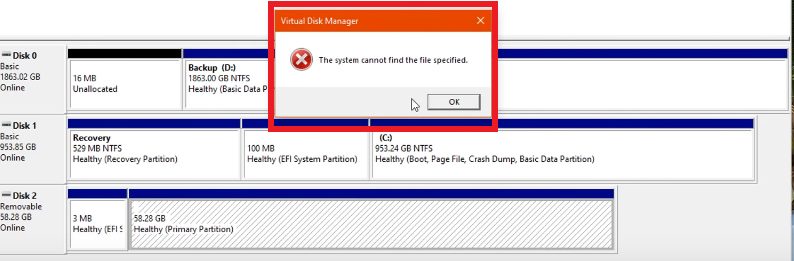
When you right-click and go change the drive letter and paths you get “the system cannot find the specified file“, try another solution given in this article.
If your PC’s drive letter’s changing doesn’t resolve your problem, I’ll show you what we can try in next solutions.
Solution 2: Update or Reinstall Drivers
Sometimes the hardware driver of a particular drive gets corrupted or not installed properly, so, updating the driver or reinstalling the driver may resolve the issue you are facing.
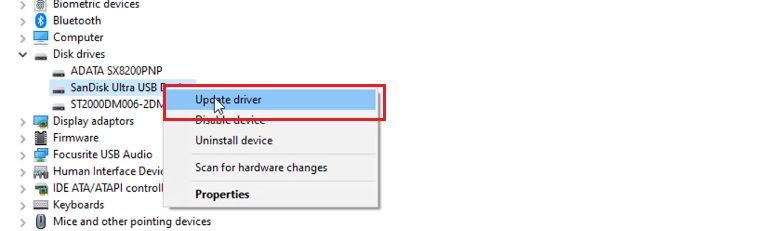
So we’re going to go-tostart->device manager, Open up the device manager.
Here and in my case, my SanDisk Ultra USB devices are visible inside the disk drives folder.

So it detects the drive, but it’s not showing up on file explorer..
Update Driver:
Now I’m going to update the driver and see if there’s a driver that I can put on to make it visible.
Sometimes this resolves the problem, but if that doesn’t do anything for you, see the next option.
Reinstall the driver:
Now I’m going to uninstall our device byright-clicking ->uninstall, and then we’re going to scan for hardware changes.

Hopefully, when this does this, it might sometimes populate there and sometimes it does happen.
So I’m going to scan for that quickly, and it’s detected, as you guys can see in the picture below.
But If in that process it still didn’t populate the drive, read the following instructions.
So what we’re going to do here is look at the universal serial bus controllers for that USB flash drive.
And we’ll try and remove those and do the same thing, so they are listed down the bottom there.
So what you can do is you can uninstall those and, hopefully, scan for those.
So I’m just going to do that right now, so let me go down here there usually; you can uninstall all USB areas here, all USB drivers.

And scan all reboot the system, and sometimes that does resolve the problem.
If it does not fix the problem and you are still getting issues, please go on and try other methods.
Solution 3: Select drive Using CMD (Command Prompt)
So you also may open up a command prompt and do some things from the command prompt.
Step 1:
So let’s go ahead and open up the command prompt, run the command prompt as an administrator.

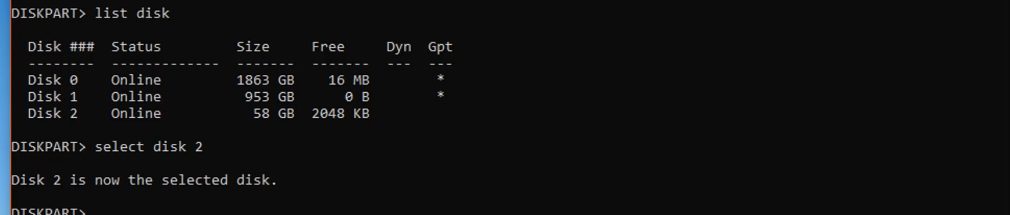
In command prompt, type “diskpart“.

Then hit enter; this will allocate you inside thedisk part.
Step 2:
When we are in thediskpart, we can type in here“list disk”, this command will give us all the disks plugged into the computer.

So let’s go ahead and selectdisk 2; and type in “select” space “disk2,” to select the drive.
Step 3:
Now you need to type “clean” on the command prompt, just like you typed previous commands. and hopefully, this resolves the problem.
If, unfortunately, the disk part has encountered an error and the device is not ready, you should see the system event log for relevant information.
Head over to the next solution, if the problem is still there.
Solution 4 – Installing MiniTool Partition Wizard:
I’m going to do it now because I’m going to try and use a piece of software to resolve this problem.
We’re going to go and get ourselves a MINI tool now.
The MINI tool is a third-party software tool, and you can get it from the mini tool website or from the which is a free tool.
We will be using this because it’s a compelling piece of software, and it does resolve a lot of these problems.
After installing, launch the mini tool partition wizard.

All the drives will be displayed on screen.
As you can see in the picture above the corrupted drive is showing up as unformatted, we will fix this first.
Step 1: Delete the Partition:
Let’s go ahead and select the whole drive here, and we’ll try todelete all the partitionson that drive.

When its done, you can now see it’s unallocated in the picture below.
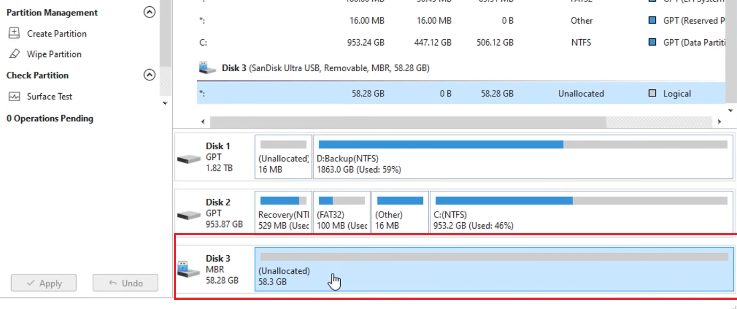
We have got the drive unallocated,and we can now create a simple volume if we wanted to; we can also check the drive.
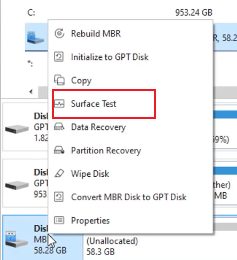
Step 2: Do A Surface Test:
Surface test detects if there is any variety of bad sectors or error inside the drive, so, I would recommend you to do a surface test.
If you do the surface test you would see the all the errors or bad sectors.

So if the test comes back good with no errors, so that will be a good sign.
The drive is in good health, and the drive was getting recognized, but for some reason.
Step 3: Create New Partition:
Once you’re done with the surface test, we can create a new partition from our drive.
So right-click on the drive and click oncreateto create a new partition; you can give it a partition label.

I’m just going to call it USB. I’m going to create it as a primary, and also, we can leave the drive letter as whatever it is there.

Leave it as file systemNTFS,and we can ClickOK.
Once this process is complete, you should probably give the PC a reboot.
If you still see the old drive letter name on the drive list, we could give it another and change the drive letter, and hopefully, that does resolve the problem.
So We might need to reboot the computer, quickly reboot the computer one more time, and we’ll see what happens.

Once the computer rebooted, you would be able to see your hard drive showing on your PC.
Have any questions?
If You have any queries about anything regarding this website, Contact US.