
Quick Navigation
An error that starts with 0xC1900101 is normally a driver error.
There are several causes why you might experience a 0xC1900101 error message or any other error message while updating or installing Windows 10.
But usual errors can be solved with several steps that you can do on your own.
An update attains your machine from an earlier Windows version, just like moving from Windows 7 or Windows 8.1 to Windows 10.
An error that starts with 0xC1900101 is normally a driver error, and these are the common error you might while installing or upgrading your windows:
Table of error codes
- 0xC1900101 – 0x2000c
- 0xC1900101 – 0x20017
- 0xC1900101 – 0x30018
- 0xC1900101 – 0x3000D
- 0xC1900101 – 0x4000D
- 0xC1900101 – 0x40017
Here are remarkable and quick ideas you can try to fix 0xC1900101 update and installation errors:
Quick Fixes: 0xC1900101
These are some of the quick fixes to try on update and installation error:
1. Your disk space is full.
0xC1900101 error can appear when there is insufficient storage available in computer’s hard drive.
You would require some handsome amount of space to upgrade your Windows, and according to Microsoft.
Your computer requires at least 16 GB of free disk space to update a 32-bit operating system.
For 64 bit your computer needs to have at least 20 GB of storage to update windows.
Follow the method below to check your hard drive remaining storage:
- Click on the Start button.
- TypeFile Explorerand selectFile Explorer(For Windows 7 Type Windows Explorer).

- Now Select This PC or Computer.
- After getting in ThisPC, right-click on the hard drive and chooseproperties.

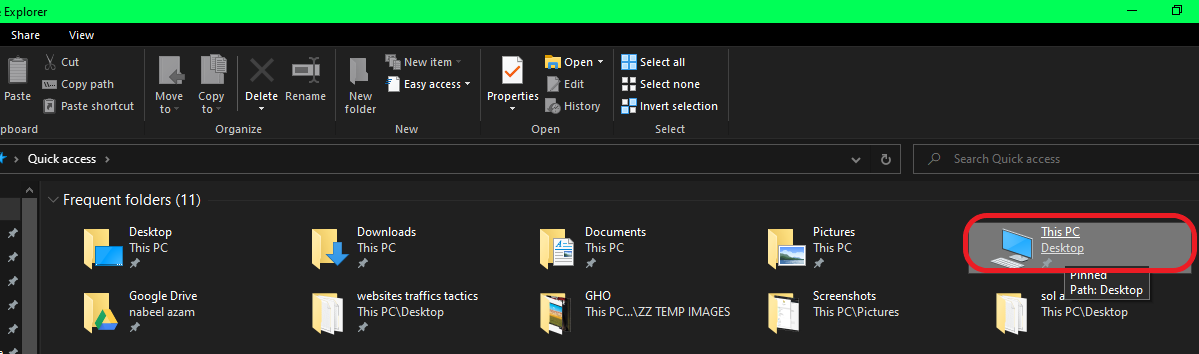
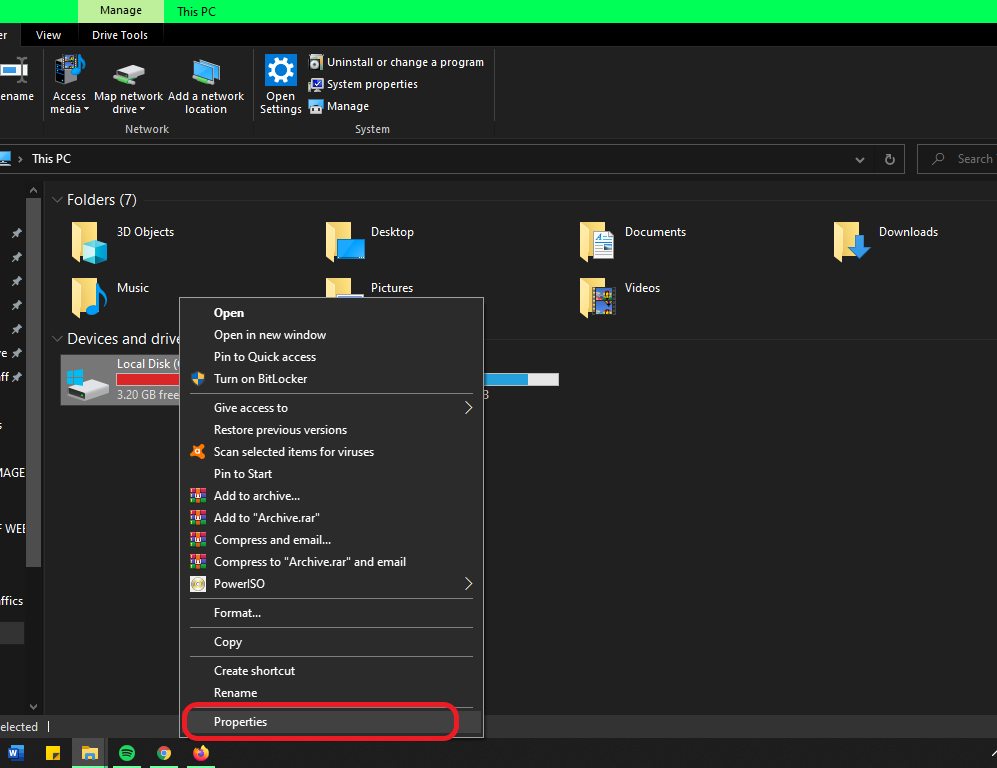
You’ll be able to see the amount of available space.

2. Unplug peripheral devices.

Sometimes unplugging any external hardware can solve the 0xC1900101 error.
Try Unplugging any insignificant hardware devices.
Specific hardware devices could include printers, scanners, headphones, speakers, USB flash drives, and any other external hard drives.
Remove the insignificant hardware devices that do not require your computer’s basic functionality.
If your laptop is plugged into a docking station, try unplugging your computer from the docking station.
3. Update your Windows.
If you are trying to upgrade your Windows 7 or Windows 8.1 to Windows 10, you need to ensure that all-important updates are installed before upgrading your PC, such as updating your computer’s hardware drivers.
You can also use Windows troubleshooter to fix Windows update errors.
4. Update third-party drivers.
Check whether a third-party drivers is outdated or not.
Just ensure to Download third-party drivers from their manufacturer’s website. And install it on your computer.
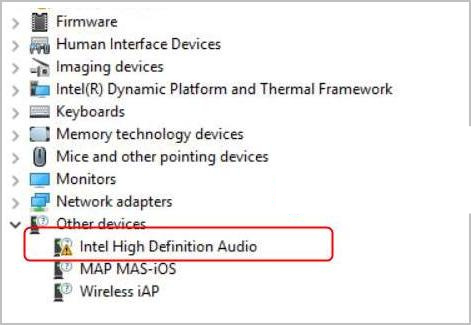
5. Find errors on Device Manager.
Follow this method to get into Device Manager.
- Tap on theStart buttonat the bottom left corner.
- Typedevice managerin the search box and chooseDevice Managerfrom results.
- Find for any device with a yellow exclamation mark.
- Select yellow exclamation marked driver,Updateyour driver’s software orUninstallthe driver software to fix the error.
6. Repair Hard drive.
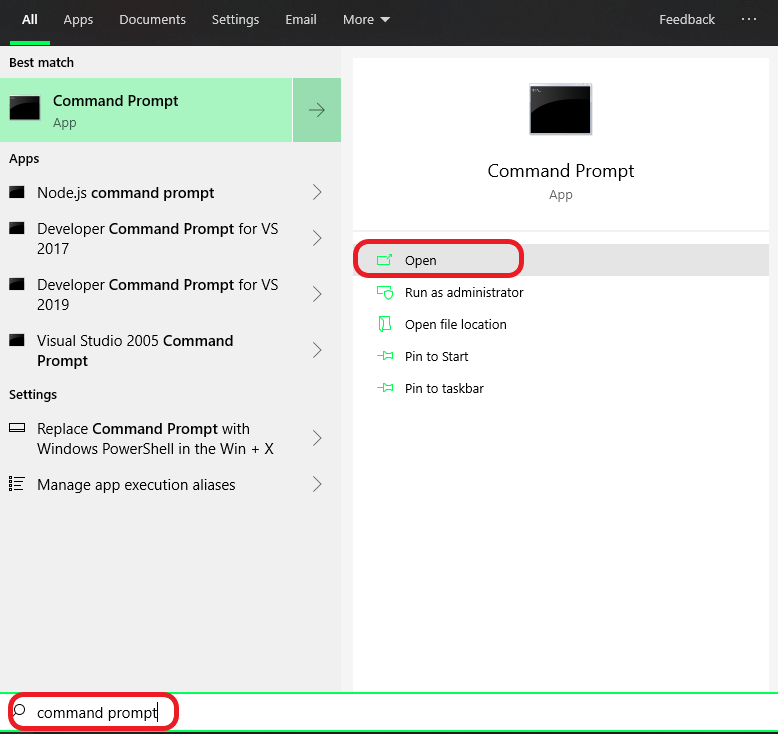
- Tap on theStart buttonat the bottom left corner,
- Typecommand promptin the search box and chooseCommand Promptfrom results.
- A black window will open, type
chkdsk/f C:and press the Enter key. - You will be required torebootyour computer.
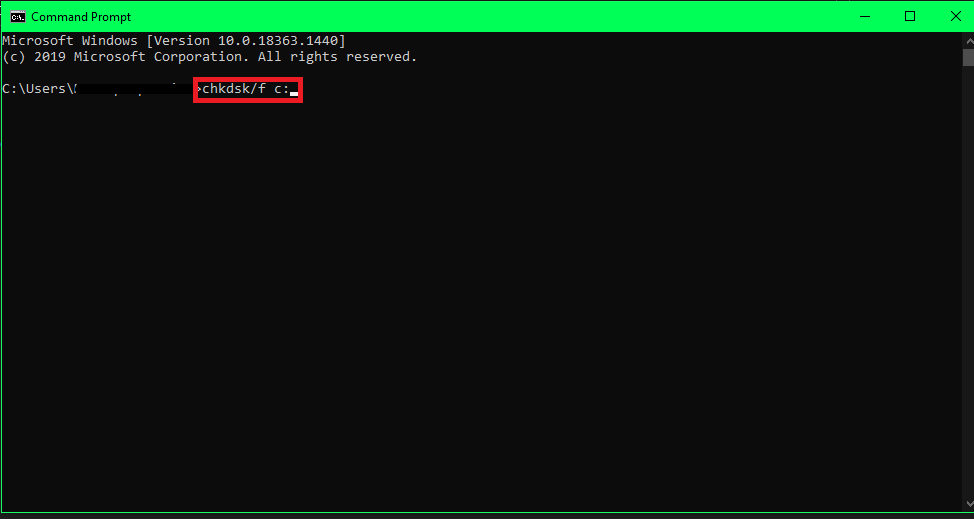
It will automaticallyrepairerrors on hard drives.
7. Repair System files.
DISM command is a tool used to repair Windows images, and you can Repair offline Windows image and online Windows image (Only if they become unserviceable).
- Tap on theStart buttonat the bottom left corner,
- Typecommand promptin the search box and chooseCommand Promptfrom results.
- A black window will open, typeDISM.exe /Online /Cleanup-image /Restorehealthand press the Enter key.
- You will be required torebootyour computer.

8. Uninstall unimportant software.
Most of the time,0xC1900101error occurs due to outdated third-party software.
Outdated software can also block some of the processes from being processed to upgrade windows versions.
As long as you have installation media, you can uninstall the Outdated Software and upgrade your windows.
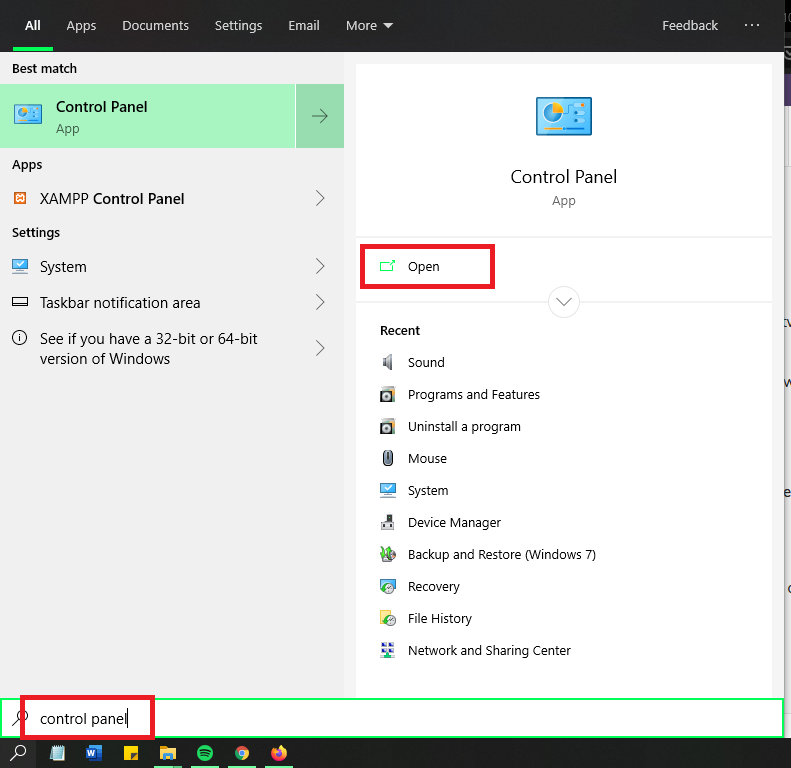
Follow this method to uninstall antivirus from your computer.
- Click on the Start button and click on search, and type “control panel.”
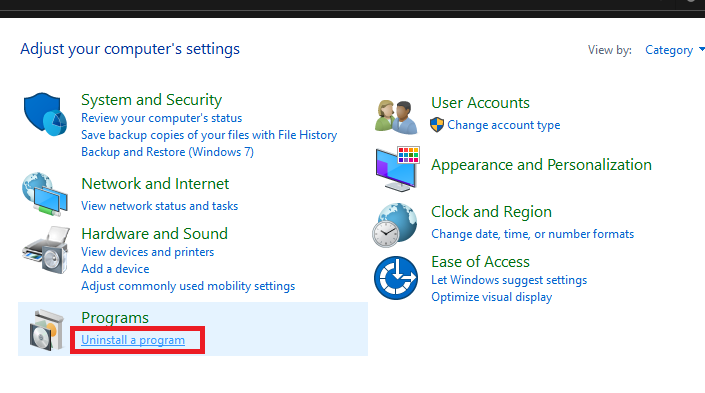
- Open Control Panel and go toControl Panel\Programs\Programs and Features.
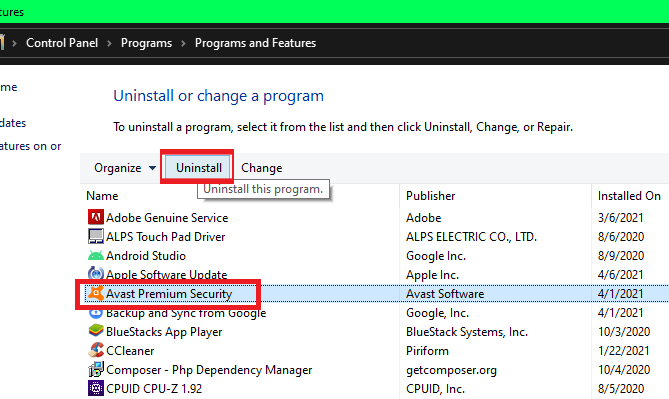
- Select the particular software, and then selectUninstall.
- SelectYesto confirm.
Outdated software may now be uninstalled. If it persists, try rebooting your computer.
9. Uninstall third-party antivirus.
Most of the time,0xC1900101error occurs due to the third-party antivirus software.
Anti-viruses block some of the processes from being processed to upgrade windows versions.
As long as you have installation media, you can uninstall the antivirus and try upgrading your windows.
Follow this method to uninstall antivirus from your computer.
- Click on the Start button and click on search and type “control panel”.
- Select Control Panel and go toControl Panel\Programs\Programs and Features.
- Select the particular antivirus, and then selectUninstall.
- Now, choose Yesto confirm.
Antivirus may now be uninstalled. If it persists, try rebooting your computer.
10. Use Windows Media Creation Tool.

If none of the above methods works out for you and you are still facing the same0xC1900101error.
Try using the Media Creation tool to complete your installation or upgrading process.
All you need to do is go to the windows Upgrade page and download the tool.
After downloading, get help with this guide on how to use the media creation tool.
Conclusion:
We have concluded the fast and easy methods to fix 0xC1900101 on windows; 0xC1900101 can prevent installing multiple updates from windows.
If those don’t fix your update or installation problem, examine the table of error codes at the top of this article, try the methods again or let us know in the comments.
Read Next: